Create a database
Installation of mfbase
If you need a database for your application, and if you don’t have a friend who is expert in database administration, you have two choices:
- Use sqlite. But it has many limitations.
- Spend hours understanding how to install and configure a database.
With MetWork Framework, you now have a third option: use the mfbase module.
Let’s install it. Login as root user, and install mfbase:
# As root user
yum -y install metwork-mfbase
Start the services:
service metwork start
Note: if you don’t have the
servicecommand installed, you can use/etc/rc.d/init.d/metwork startinstead
Create and run the database
The mfbase module supports different types of databases, such as postgresql and webdav.
Let’s create a postgresql database.
As for other MetWork Framework modules, in mfbase you begin by creating a plugin:
# As mfbase user
su - mfbase
bootstrap_plugin.py create foo
Press enter several times to accept default values.
Edit ~/foo/sql/foo.sql and put:
-- SQL queries to run during plugin installation
CREATE TABLE records(
    name VARCHAR (355)
)
The SQL queries in this file will be executed at the creation of the database. It is not mandatory to use this file, you can also create your tables later.
Then release the plugin:
# As mfbase user
cd ~/foo
make release
The make release command should output something like ‘plugin is ready at /home/mfbase/foo/foo-0.0.1-1.metwork.mfbase.plugin’. Copy the filename (without the path) and use the following command to install and run your mfbase plugin:
plugins.install [YOUR_PLUGIN_FILENAME_HERE]
# For instance plugins.install foo-0.0.1-1.metwork.mfbase.plugin
That’s all. Your database should be running.
Check your database
Connect to your database:
psql -U plugin_foo -h localhost -p 7432 plugin_foo
When prompted, use the password plugin_foo.
In the psql prompt, check that your table ‘records’ has been created:
plugin_foo=> \d records
You should see an output confirming that your table exists.
Note that if you use the command \d to list all tables, you will see several other tables. These tables have been created by the postgis extension. With postgis, you can easily store geographic objects in your database, if you need to do so.
To quit the psql prompt, enter \q.
Put data in our database
Let’s add some code in the API we have built previously, to populate the database.
Login as mfserv:
su - mfserv
Edit the code of our tutorial api, in the file ~/tutorial/tutorial/server.js. At the beginning of the file, add this code to connect to the database:
const { Pool, Client } = require('pg')

const client = new Client({
    user: 'plugin_foo',
    host: 'localhost',
    database: 'plugin_foo',
    password: 'plugin_foo',
    port: 7432,
})
client.connect()
And add a line to write something in the database, just after res.send...:
    ...
    res.send('Hello World tutorial! You have entered: ' + entry)
    client.query('INSERT INTO records VALUES (\'' + entry +'\');')
    ...
Of course, this is quick and dirty code! This is just for the demo. I’m sure you will write better code in your apps!
Before running this code, we have to install the ‘pg’ (postgresql) library for nodejs. This is very easy:
# As mfserv user
cd ~/tutorial
# Install pg library
npm install pg
# Restart the plugin
make develop
Now you can open again your browser on your API url http://localhost:18868/tutorial?q=foobar. I let you check that each request makes an insert into the database:
# As mfbase user
su - mfbase
psql -U plugin_foo -h localhost -p 7432 plugin_foo
#Enter password `plugin_foo`
SELECT * FROM records;
\q
Monitor your database
The process to configure monitoring for mfbase is very similar to mfserv. You have to tell mfbase to send its logs to mfadmin installed on localhost.
Switch to mfbase user:
# Switch to mfbase user
su - mfbase
And then edit the file ~/config/config.ini. In the [admin] section, add hostname=localhost. It should look like that:
...
[admin]

# Hostname hosting the mfadmin module (if any)
# null => no monitoring
hostname=localhost
...
Finally, restart mfbase service:
# As root user
su -
service metwork restart mfbase
Note: if you don’t have the
servicecommand installed, you can use/etc/rc.d/init.d/metwork restart mfbaseinstead
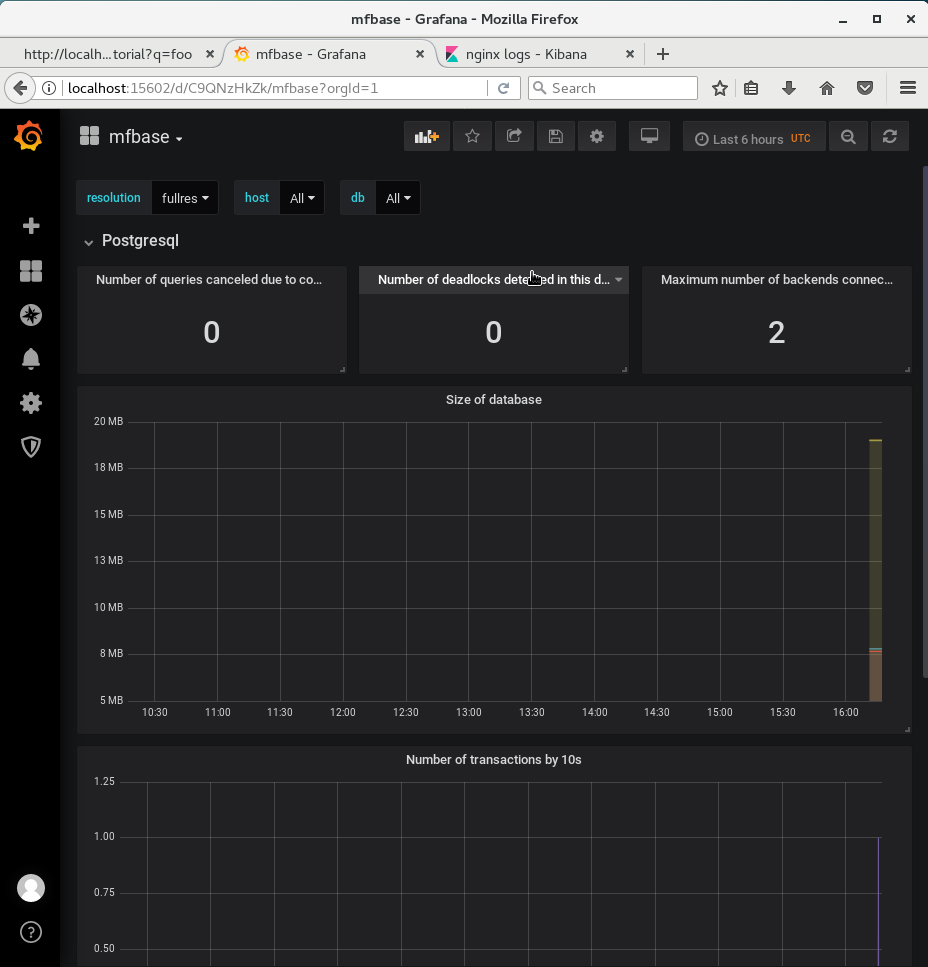
Make some requests on your API url http://localhost:18868/tutorial?q=foobar, and open your Grafana dashboard: http://localhost:15602. Head to ‘Dashboards / mfbase’, and you should see a dashboard with some metrics about your database:
